


Step-by-Step Guide for Beginners to How to Build a Game
 179
179Table of Contents
Introduction
This is a guide for beginners who wants to build a game, Game development has evolved into an exciting and accessible field, where individuals can turn their creative ideas into interactive experiences. If you’re a beginner looking to build your first simple game, you might feel overwhelmed by the plethora of tools, languages, and techniques available. This guide aims to demystify the game development process, providing a step-by-step approach to creating your very first game. Whether you dream of creating a platformer, puzzle game, or an interactive story, this comprehensive guide will help you navigate the process with clarity and confidence.
Part 1: Understanding Game Development
Before diving into the actual building process, it’s essential to understand what game development entails.
1. What is Game Development?
Game development involves designing, creating, and publishing games for various platforms, including computers, consoles, and mobile devices. The process encompasses various disciplines, including:
- Game Design: Crafting the game’s mechanics, story, and overall experience.
- Programming: Writing the code that makes the game function.
- Art and Animation: Creating visual elements and animations that bring the game to life.
- Sound Design: Composing music and sound effects that enhance the gaming experience.
- Testing: Identifying and fixing bugs, ensuring a smooth user experience.
2. Types of Games
Understanding the types of games you can create will help you define your project’s scope. Some popular game genres include:
- Platformers: Games where players navigate levels by jumping between platforms (e.g., Super Mario).
- Puzzle Games: Games that require problem-solving skills (e.g., Tetris).
- Adventure Games: Story-driven games where players explore and interact with the environment (e.g., The Legend of Zelda).
- Simulation Games: Games that mimic real-world activities (e.g., The Sims).
- Role-Playing Games (RPGs): Games that allow players to assume the roles of characters in a fictional setting (e.g., Final Fantasy).
Part 2: Preparing to Build Your Game
1. Conceptualization
The first step in creating your game is coming up with a solid concept. Here are some strategies for brainstorming ideas:
- Play Games: Engage with various games to see what you enjoy and find inspiring. Take notes on game mechanics and features that catch your interest.
- Mind Mapping: Use mind maps to explore different aspects of your game, such as themes, mechanics, and characters.
- Story Inspiration: Think about stories or themes you love. How could you translate them into a game format?
2. Defining Your Game’s Goals
Once you have a concept, define the primary goal of your game. Consider the following questions:
- What do players need to achieve?
- What challenges will they face?
- How do players interact with the game world?
For example, in a platformer, the player’s goal might be to reach the end of each level while overcoming obstacles.
3. Creating a Game Design Document (GDD)
A Game Design Document (GDD) is crucial for planning your project. It should include:
- Game Title: A catchy name that reflects your game’s theme.
- Game Overview: A brief summary of your game, including its genre and target audience.
- Gameplay Mechanics: Detailed descriptions of how the game works, including player controls, objectives, and scoring systems.
- Art Style: Notes on the visual style you envision, including colors, characters, and environments.
- Storyline: An outline of the narrative, including character backstories and plot progression.
4. Setting Milestones
Breaking your project into manageable milestones will help you stay organized and motivated. Each milestone should have specific objectives and deadlines. Here’s an example timeline:
- Week 1-2: Conceptualization and GDD creation.
- Week 3-4: Learning the chosen game engine and basic prototyping.
- Week 5-8: Core game development (coding, artwork, sound).
- Week 9-10: Testing and polishing.
- Week 11: Launch preparation and marketing.
Part 3: Choosing the Right Tools
Selecting the right tools and resources for game development is crucial. Here’s a look at some popular game engines and resources suitable for beginners:
1. Game Engines
- Unity: A powerful and versatile game engine for both 2D and 3D games. It uses C# for scripting and offers extensive documentation and community support. Unity is ideal for beginners who want to explore more complex game development in the future.
- GameMaker Studio: A user-friendly engine specifically designed for 2D game development. GameMaker Studio features a drag-and-drop interface, making it accessible for those with little to no programming experience.
- Scratch: A visual programming language developed for beginners, primarily aimed at children. Scratch allows users to create simple games using a block-based coding interface, making it perfect for absolute newcomers.
- Godot: An open-source game engine that supports both 2D and 3D development. It features a user-friendly interface and uses GDScript, which is similar to Python, making it easy to learn for beginners.
2. Art and Sound Assets
As a beginner, you may not have the skills to create all your artwork and sound. Consider using free resources:
- OpenGameArt: A platform offering free game assets, including sprites, backgrounds, and sounds.
- Unity Asset Store: A marketplace where you can find both free and paid assets for your Unity projects.
- Kenney.nl: Offers a wide range of free game assets, including graphics and sound effects.
3. Learning Resources
Investing time in learning resources will enhance your development skills:
- Online Courses: Platforms like Udemy, Coursera, and edX offer courses on game development, covering various engines and programming languages.
- YouTube Tutorials: Many YouTubers create step-by-step tutorials on game development for different engines. Search for channels that focus on beginner-friendly content.
- Forums and Communities: Joining forums like Reddit’s r/gamedev or Stack Overflow can provide valuable insights and answers to your questions.
Part 4: Development Process
Now that you have your concept, tools, and resources ready, it’s time to dive into the development process.
1. Prototyping
Start by creating a basic prototype of your game. Focus on core mechanics without worrying about graphics or sound initially. Here are some tips for effective prototyping:
- Simplify: Strip down your game to its core mechanics. For example, if you’re building a platformer, focus on player movement and jumping before adding enemies or levels.
- Iterate: Don’t be afraid to make changes as you test your prototype. The goal is to create a functional version of your game that you can refine over time.
2. Core Development
Once your prototype is functional, you can start adding more features and refining your game. This phase includes:
- Coding: Implement game mechanics, player controls, and interactions. Use your GDD as a reference for features you want to include.
- Art and Animation: Start creating or sourcing visual assets for your game. Ensure your art style aligns with the theme of your game.
- Sound Design: Add sound effects and music to enhance the gaming experience. Sound plays a crucial role in immersion and can greatly impact player engagement.
3. Playtesting
Testing your game regularly is crucial for identifying bugs and improving gameplay. Consider the following:
- Internal Testing: Playtest the game yourself and make notes of any issues or areas that feel off.
- External Testing: Share your game with friends, family, or fellow developers. Gather feedback on gameplay, mechanics, and overall enjoyment.
- Iterate Based on Feedback: Use the feedback you receive to make necessary adjustments and improvements. This may include tweaking levels, adjusting difficulty, or refining controls.
Part 5: Finalizing Your Game

Once you’ve developed your game and conducted thorough playtesting, it’s time to focus on the final steps.
1. Polishing Your Game
In this phase, you’ll want to refine every aspect of your game:
- Graphics: Improve visual assets by adding details, optimizing performance, and ensuring consistency in style.
- Sound: Finalize your sound effects and music tracks. Ensure they fit the game’s atmosphere and enhance the player’s experience.
- Gameplay: Fine-tune gameplay mechanics to balance challenge and enjoyment. Make sure your game is engaging and rewarding for players.
2. Marketing Your Game
Before launching, develop a marketing strategy to promote your game:
- Create a Website or Landing Page: Showcase your game’s features, art, and trailers. Include a way for players to sign up for updates or a mailing list.
- Social Media: Utilize platforms like Twitter, Facebook, and Instagram to share updates, teasers, and engage with your audience.
- Game Trailers: Create a short, captivating trailer showcasing your game’s gameplay, story, and features. This is a valuable marketing tool that can attract potential players.
3. Launching Your Game
Finally, it’s time to release your game:
- Choose Distribution Platforms: Decide where you want to publish your game. Options include Steam, Itch.io, and mobile app stores. Each platform has its requirements, so research the best fit for your game.
- Release Date: Pick a launch date and plan your promotional activities leading up to it. Consider participating in gaming events or online showcases to gain visibility.
Part 6: Post-Launch Considerations

Congratulations! You’ve built and launched your first game. However, the journey doesn’t end here. Consider the following post-launch activities:
1. Gather Player Feedback
Listen to player feedback to understand their experiences and identify areas for improvement. Use surveys, social media, or direct communication to gather insights.
2. Update and Improve
Based on feedback, consider releasing updates or patches to address any issues. You may also want to add new features or content to keep players engaged.
3. Reflect on the Experience
Take time to reflect on your game development journey. What worked well? What challenges did you face? What would you do differently next time? Documenting these insights will help you grow as a developer for future projects.
FAQ Section
1. Do I need to know how to code to make a game? While coding knowledge can be beneficial, many beginner-friendly game engines, like GameMaker Studio and Scratch, allow you to create games without extensive programming skills.
2. How long does it take to build a simple game? The time required varies based on the complexity of your game and your experience level. A simple game can take anywhere from a few weeks to several months to complete.
3. Can I make money from my game? Yes, many developers monetize their games through sales, in-game purchases, or advertising. However, success depends on various factors, including marketing and audience engagement.
4. What if I get stuck during development? It’s normal to encounter challenges during game development. Seek help from online forums, communities, or tutorial resources. Collaborating with others can also provide fresh perspectives and solutions.
5. Should I focus on one game or create multiple small projects? Starting with one game allows you to see a project through to completion, which is valuable for learning. Once comfortable, you can explore creating multiple projects to experiment with different concepts and techniques.
Building your first simple game is an exciting and rewarding journey that allows you to express your creativity and learn valuable skills. By following this step-by-step guide, you’ll gain a clear understanding of the game development process, from conceptualization to launch. Remember to embrace the learning curve, stay persistent, and most importantly, have fun creating your game. With practice and dedication, you’ll be well on your way to becoming a skilled game developer. Happy gaming!
Personal Advice and Suggestions
As you start on your journey to build your first simple game, here are some personal insights and suggestions that can help you navigate the process more effectively:
1. Start Small and Simple
When you’re just starting, it’s tempting to dive into complex projects inspired by your favorite games. However, beginning with small, manageable projects allows you to learn the basics without feeling overwhelmed. Choose a simple game concept that you can realistically complete in a short time frame. This will help you understand the entire development cycle and provide a sense of accomplishment.
2. Embrace Learning and Iteration
Game development is an iterative process. Don’t be afraid to experiment and make mistakes. Each mistake is an opportunity to learn. As you build your game, continuously test and refine your mechanics. Seek feedback from others and use it constructively to improve your game.
3. Focus on Core Mechanics
Before adding intricate graphics and advanced features, concentrate on the core mechanics of your game. Ask yourself:
- What makes my game fun?
- How do players interact with the game world?
- What challenges do I want to present?
Developing a solid foundation in gameplay mechanics will ensure that your game is engaging and enjoyable.
4. Get Involved in the Community
Join online forums, Discord servers, or social media groups dedicated to game development. Engaging with a community of like-minded individuals can provide valuable support, inspiration, and feedback. Sharing your progress and challenges with others can also help you stay motivated.
5. Utilize Online Resources
Take advantage of the wealth of online resources available for game development. Whether it’s tutorials, forums, or video courses, there’s a vast amount of information that can help you understand different aspects of game design and programming. Sites like YouTube, Udemy, and GDC Vault offer valuable insights into the industry.
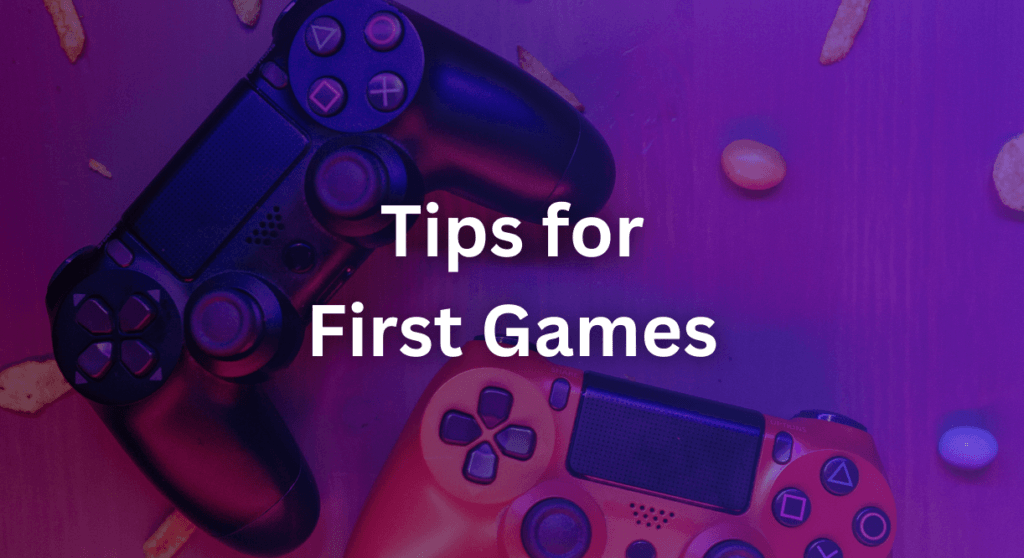
Tips for First Games
Here are some specific game types that beginners can build to reinforce their foundational skills while ensuring the process remains enjoyable and educational:
1. Pong
A classic game that’s simple to code and understand. Building Pong will teach you about:
- Basic 2D physics (ball movement and collision detection).
- Player input handling (using keyboard controls).
- Game loop structure and scorekeeping.
2. Tic Tac Toe
This turn-based game is great for understanding game logic and conditions. Developing Tic Tac Toe will help you learn about:
- Managing player turns.
- Checking win conditions and draws.
- Implementing a simple user interface.
3. Flappy Bird Clone
Creating a clone of this popular game will introduce you to:
- Gravity and physics in game development.
- Generating random obstacles (pipes) and handling collisions.
- Creating a simple scoring system and game over mechanics.
4. Endless Runner
An endless runner, like Temple Run, is excellent for beginners looking to learn about procedural generation. This type of game helps you practice:
- Continuous level generation (infinite scrolling).
- Character movement and jumping mechanics.
- Creating power-ups and collectibles.
5. Basic Platformer
Building a simple platformer, such as Super Mario, will deepen your understanding of:
- Character controls (jumping, running).
- Level design (creating platforms, obstacles).
- Physics interactions (gravity, falling).
6. Memory Card Game
A memory card game is excellent for learning about game states and player interaction. This project will enhance your skills in:
- Creating a grid-based layout.
- Tracking player choices and matches.
- Implementing a timer or score system.
7. Adventure Text-Based Game
If you’re interested in narrative-driven experiences, consider developing a simple text-based adventure game. This project will teach you about:
- Storytelling and branching narratives.
- User input handling through text.
- Implementing game state management based on player choices.
Final Thoughts
Remember, game development is a journey filled with challenges and learning opportunities. Starting with simple projects allows you to build your skills incrementally. As you gain more confidence and expertise, you can tackle more complex ideas and genres. Stay curious, embrace the learning process, and most importantly, have fun creating! Your first game is just the beginning of an exciting adventure in the world of game development.


What do you think?
It is nice to know your opinion. Leave a comment.